Introduction
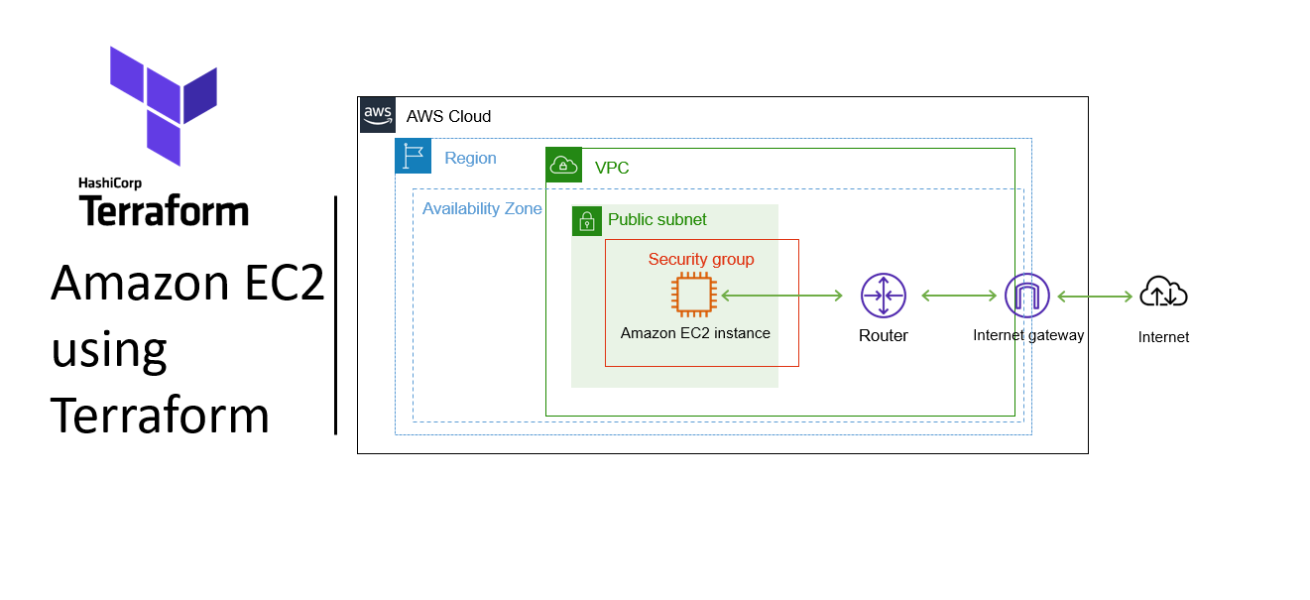
Terraform is an open-source Infrastructure as Code (IaC) program that makes it easier and more automatic to launch an EC2 instance on AWS. Terraform automates and defines deployments, assisting in effective infrastructure management. From preparation to deployment, this blog will guide you through the Terraform EC2 instance launch process.
Step-by-step procedure for provisioning infrastructure using Terraform
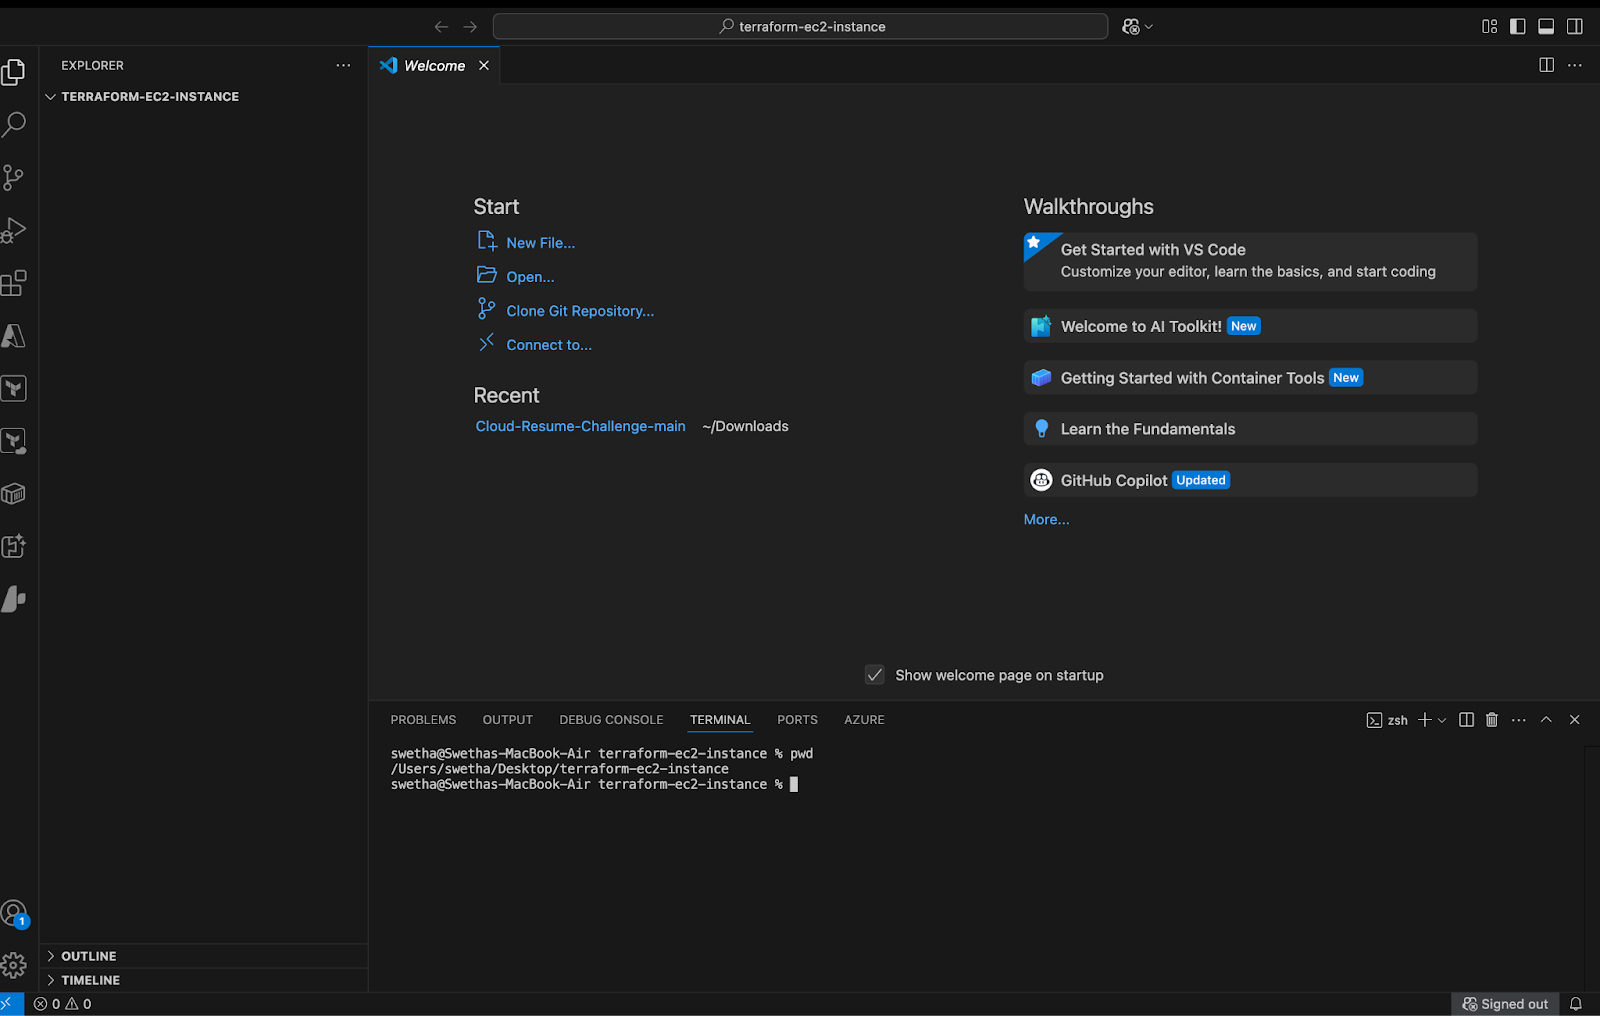
Step1: Set up the Terraform Project
- Open the visual studio code.
- If you have already installed and using Visual studio code, open a new window.
- A new window will open a new file and release notes page (only if you have installed or updated Visual Studio Code recently). Close the Release notes tab.
- Open Terminal by selecting View from the Menu bar and choose Terminal.
- Once the terminal is ready, let us navigate to the Desktop.
cd Desktop
6. Create a new folder by running the below command.
mkdir terraform-ec2-instance
7. Change your present working directory to use the newly created folder by running the below command
cd terraform-ec2-instance
8. Get the location of the present working directory by running the below command
pwd
9. Get the location of the present working directory by running the below command
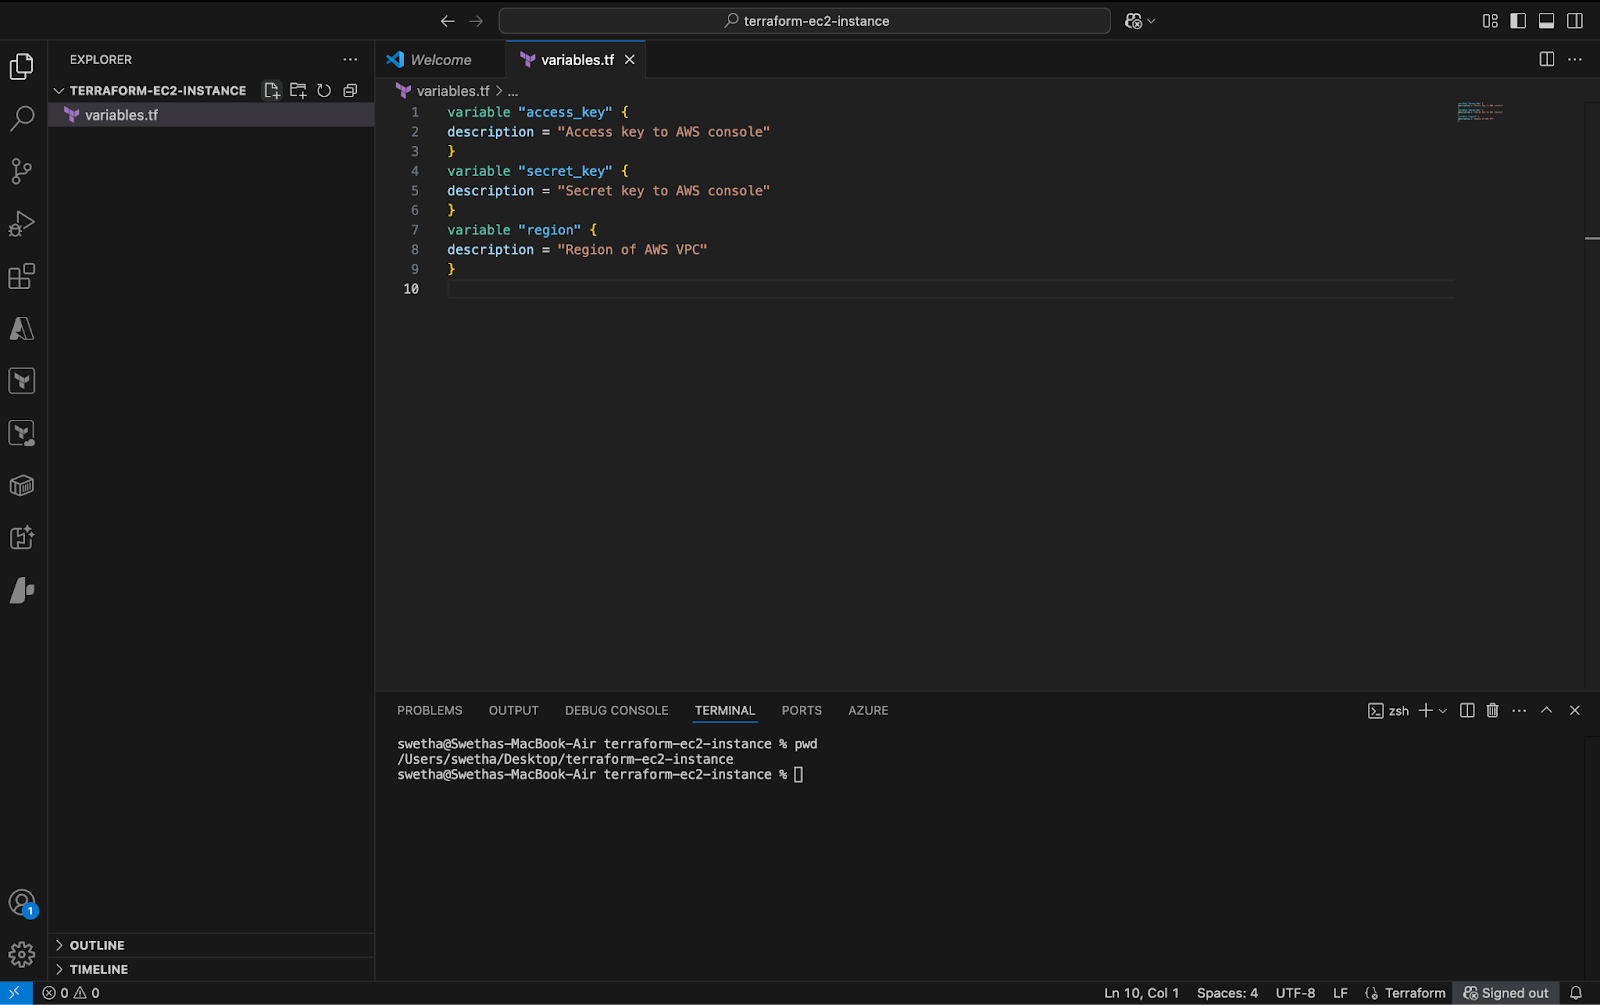
Step2: Create a Variables File
- Create a file name as variables.tf
- Copy and paste the below code in variables.tf
variable “access_key” {
description = “Access key to AWS console”
}
variable “secret_key” {
description = “Secret key to AWS console”
}
variable “region” {
description = “Region of AWS VPC”
}
3. After pasting the above contents, save the file by pressing ctrl + S.
4. Create a new file for terraform.tfvars and press enter to save it.
5. Paste the below code and click on ctrl s to save it.
region = “us-east-1”
access_key = “<YOUR AWS CONSOLE ACCESS ID>”
secret_key = “<YOUR AWS CONSOLE SECRET KEY>”
6. Replace with your access key and secret key of your AWS Account

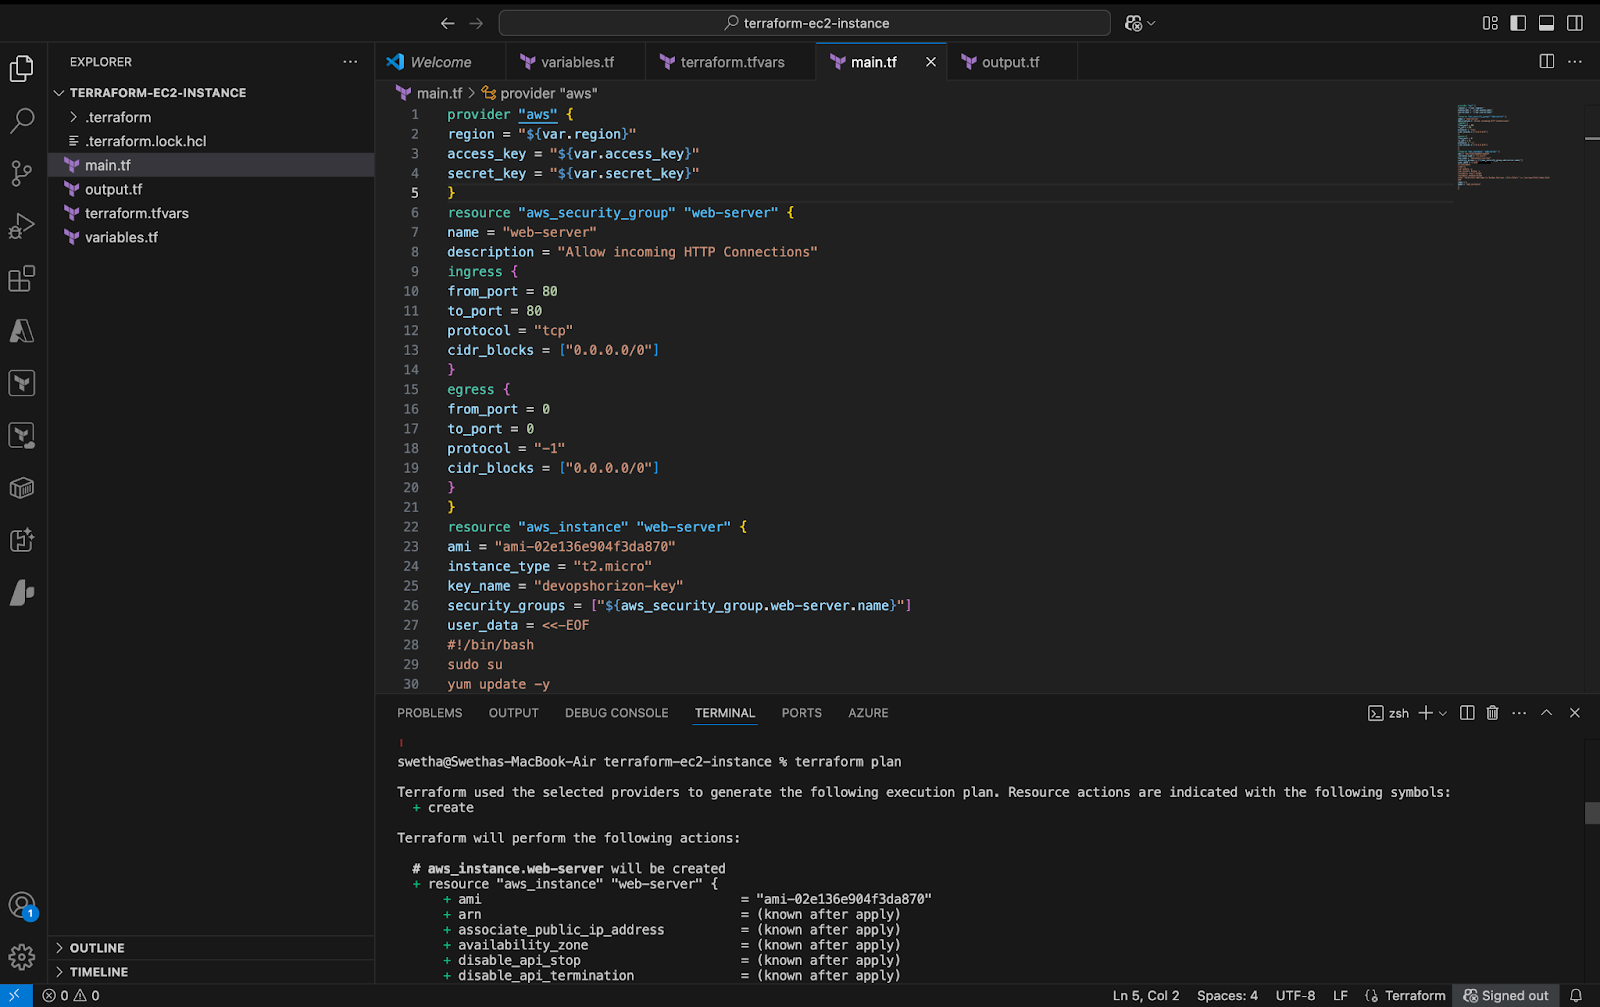
Step 3: Create EC2 and its components in main.tf
provider “aws” {
region = “${var.region}”
access_key = “${var.access_key}”
secret_key = “${var.secret_key}”
}
3. In the above code, we are defining the provider as aws.
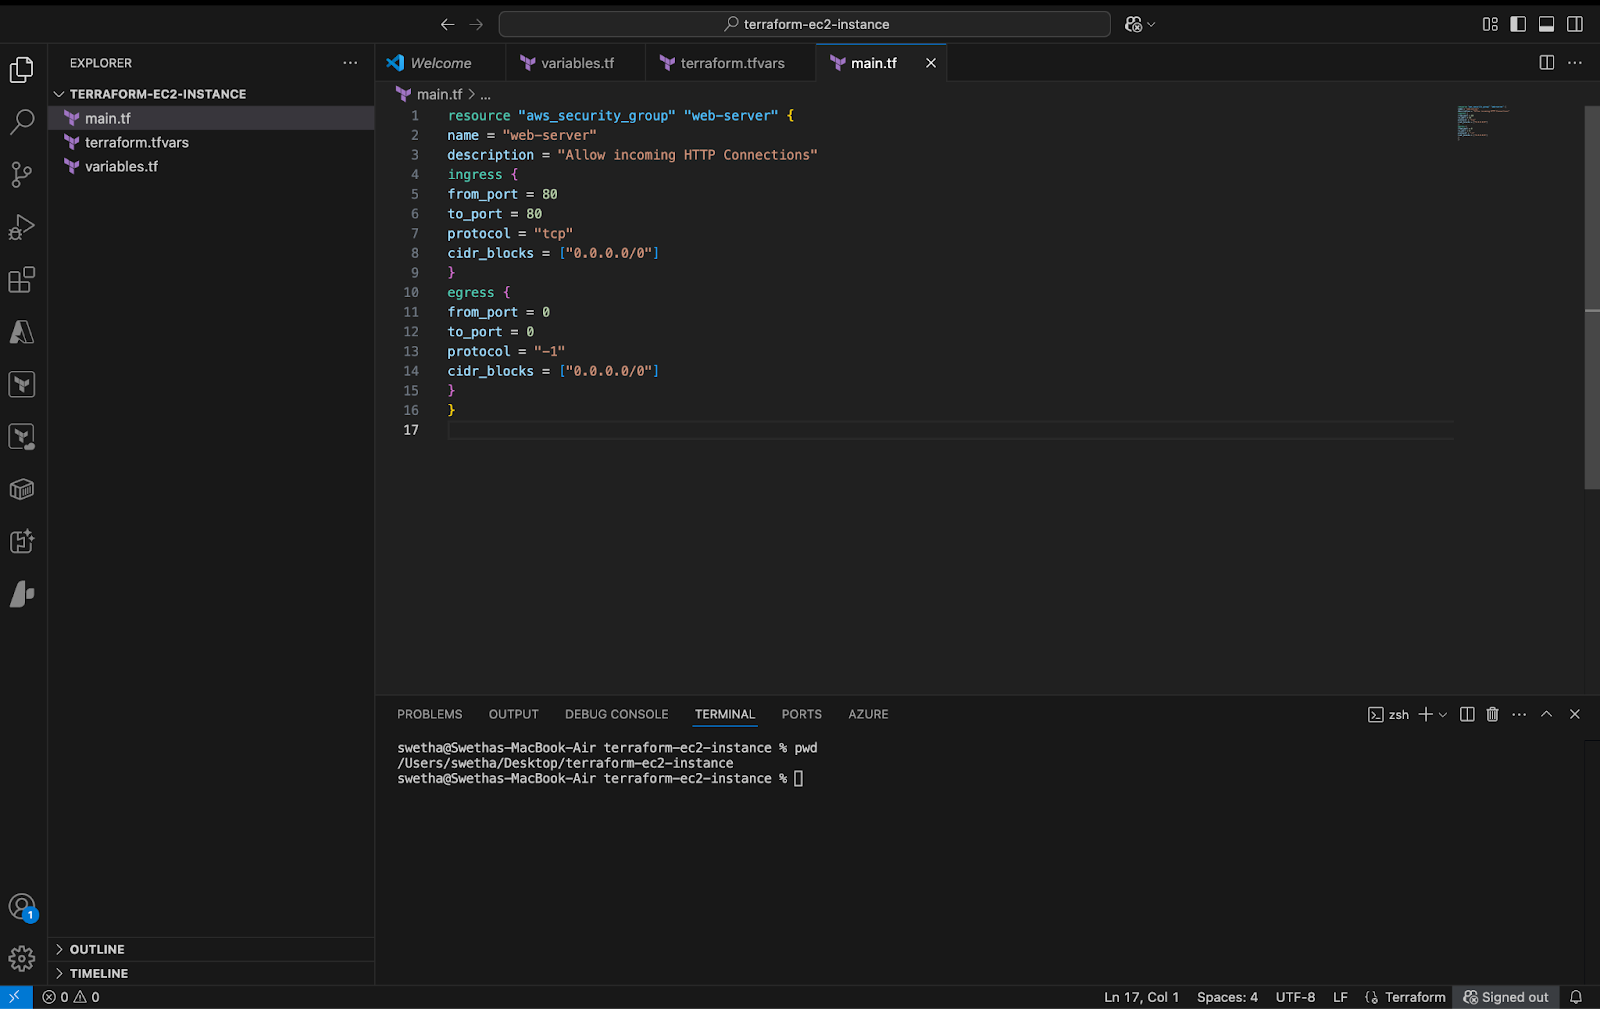
4. We have to create a security group within EC2 and add the rules to allow the traffic on specific ports.
5. Make sure that instance can connect any outbound port, so we need to allow egress as well.
6. Paste the below code in the main.tf file
resource “aws_security_group” “web-server” {
name = “web-server”
description = “Allow incoming HTTP Connections”
ingress {
from_port = 80
to_port = 80
protocol = “tcp”
cidr_blocks = [“0.0.0.0/0”]
}
egress {
from_port = 0
to_port = 0
protocol = “-1”
cidr_blocks = [“0.0.0.0/0”]
}
}
7. Finally we are going create the EC2 Instance below the Security Group code.
resource “aws_instance” “web-server” {
ami = “ami-02e136e904f3da870”
instance_type = “t2.micro”
key_name = “devopshorizon-key”
security_groups = [“${aws_security_group.web-server.name}”]
user_data = <<-EOF
#!/bin/bash
sudo su
yum update -y
yum install httpd -y
systemctl start httpd
systemctl enable httpd
echo “<html><h1> Welcome to DevOps Horizon </h1></html>” >> /var/www/html/index.html
EOF
tags = {
Name = “web_instance”
}
}
8. In the above code, we have defined the Amazon Linux 2 AMI. The AMI ID mentioned above is for the us-east-1 region.
9. We have mentioned the resource which SSH key to use (which is already present in your AWS EC2 console). The security group ID is automatically taken by using the variable which will be set during the creation process.
10. We have added the user data to install the apache server.
11. We have provided tags for the EC2 instance.
12. Save the file by pressing Ctrl + S.
Step4: Create an Output file
output “web_instance_ip” {
value = aws_instance.web-server.public_ip
}
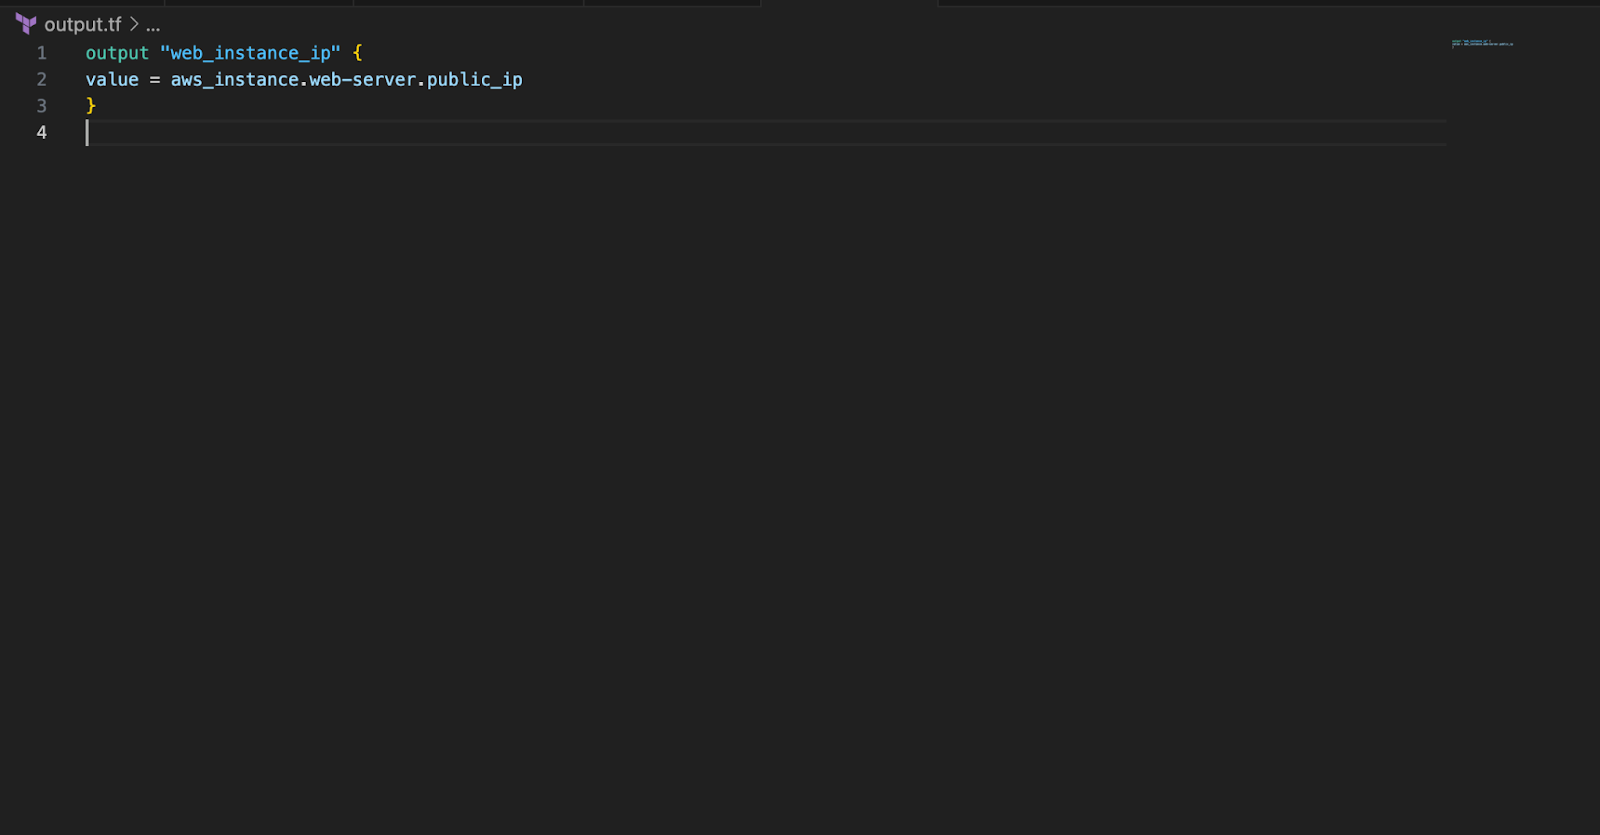
3. In the above code, we will extract the Public IP of the created EC2 instance and display it once the instance is created.
Step5: Apply the configurations
- To confirm the installation of Terraform, run the below command to check the version
terraform version
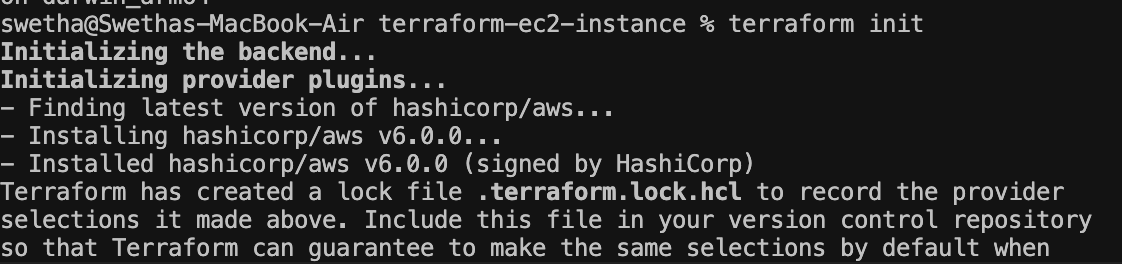
2. Initialize Terraform by running the below command
terraform init
3. To generate the action plans run the below command
terraform plan
4. To create all the resources declared in main.tf configuration file, run the below command
terraform apply
5. You will able to see the resources are getting deployed to AWS Console.
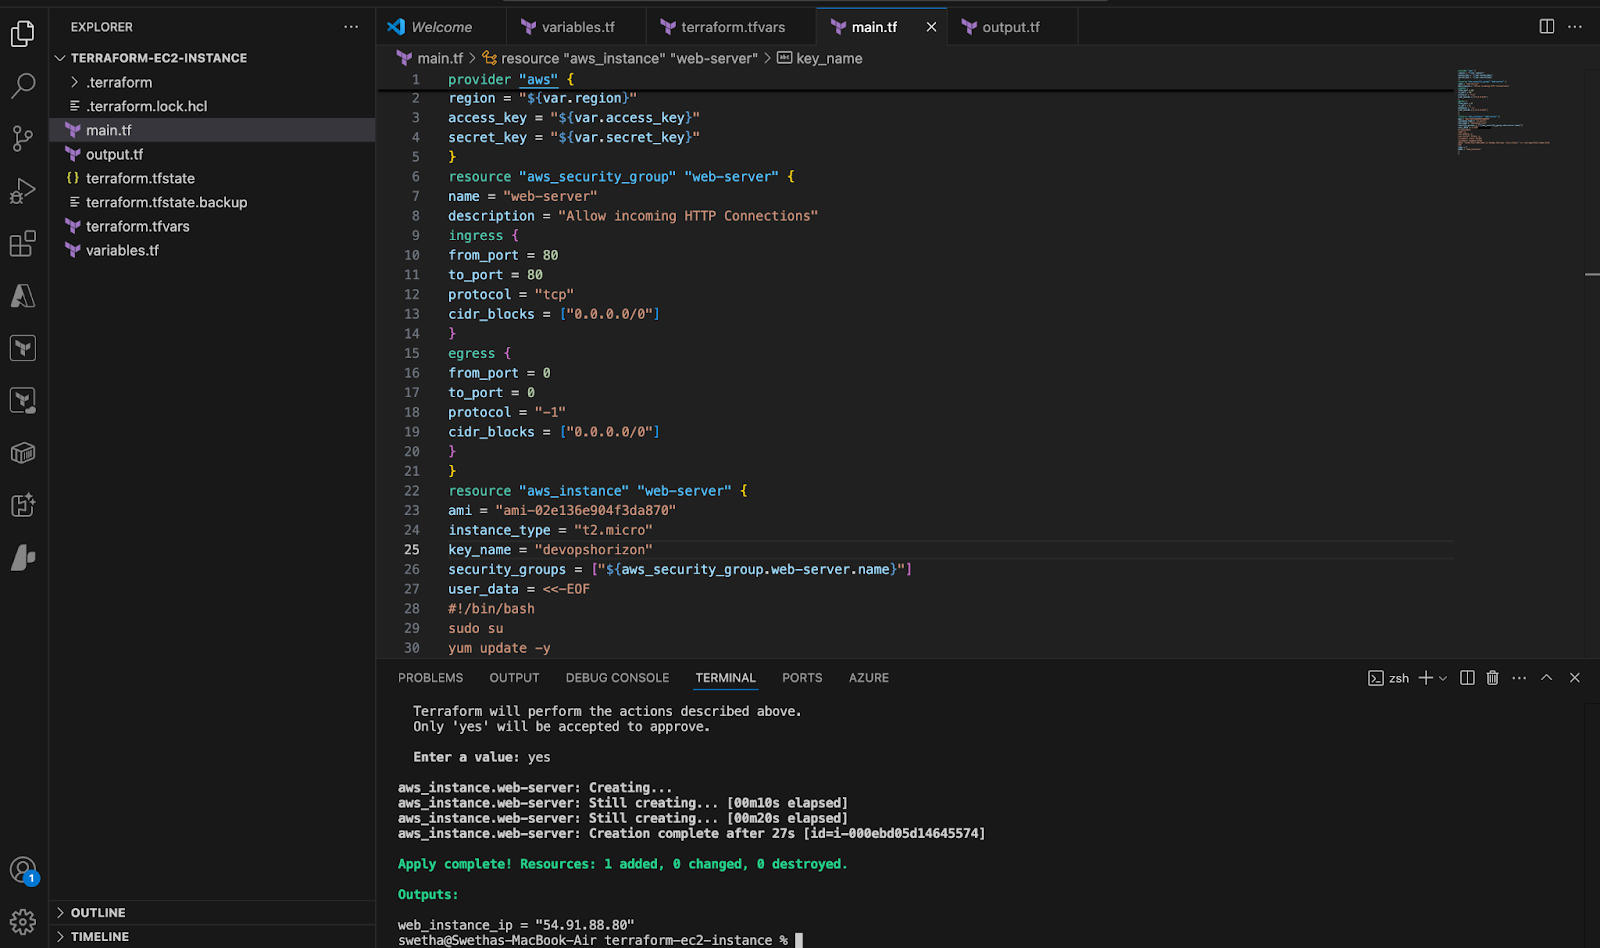
6. The output i.e Public IP of the EC2 instance is extracted and displayed. Copy the Public IP.
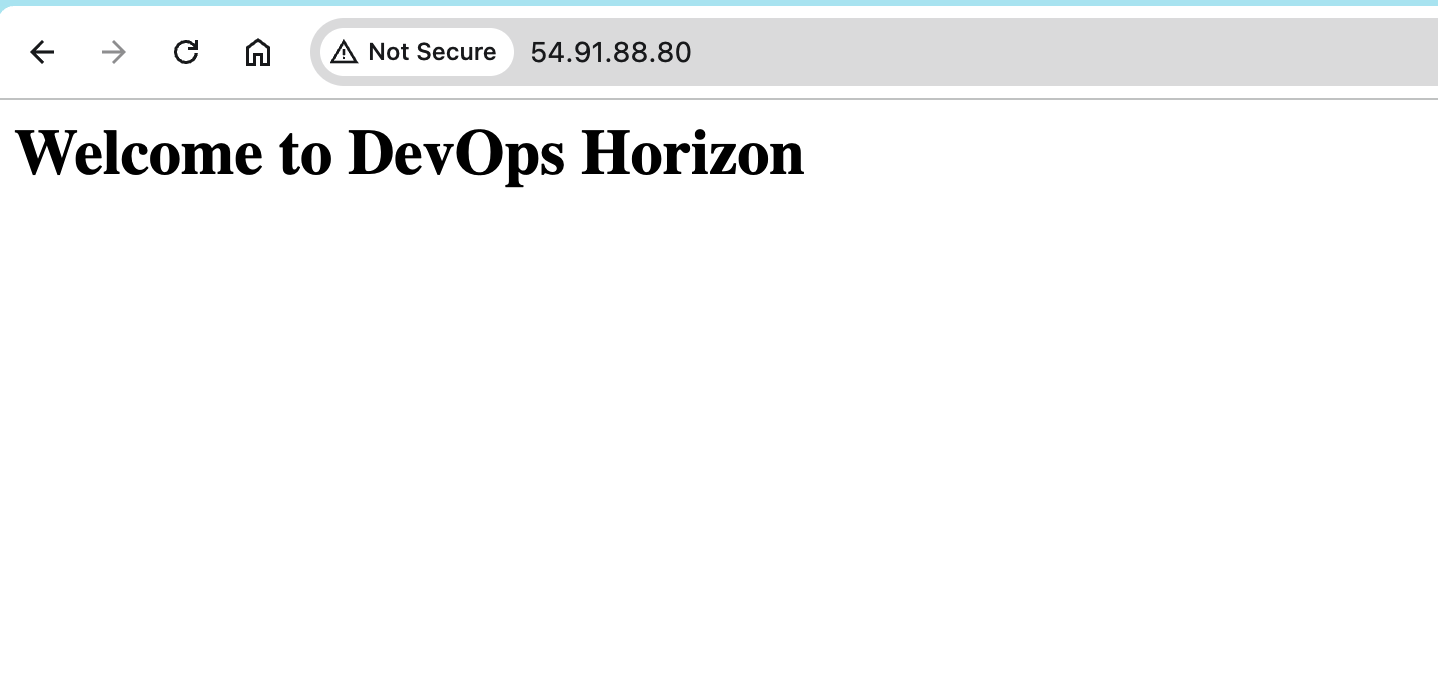
Step5: Check the HTML page
- Copy the public ip and paste it in the browser, you will be able to see the web page.
Step6: Cleanup the resources
- To avoid unnecessary charges, destroy the created resources
terraform destroy
2. Type yes to confirm the destruction.
Best Practices
Use Variables: Avoid hardcoding values. Store them in a variables.tf file:
variable “region” {
default = “us-east-1”
}
provider “aws” {
region = var.region
}
State Management: Use remote state storage like AWS S3 to collaborate and maintain consistency.
Version Control: Store Terraform configurations in a version control system like Git.
Conclusion
Launching an EC2 instance using Terraform is a straightforward process that underscores the power of Infrastructure as Code. By following these steps, you can deploy consistent, repeatable infrastructure while saving time and reducing manual errors. Expand on this by exploring advanced Terraform features like modules, workspaces, and state locking to manage your infrastructure at scale. Follow DevOps Horizon for more blogs on DevOps Horizon.