Introduction
In the current digital environment, the significance of a secure cloud infrastructure is important. As companies move to the cloud, securing their assets inside a Virtual Private Cloud (VPC) is essential. AWS offers a range of tools and best practices to establish layered security within a VPC, protecting applications and data from both internal and external threats. This blog examines the idea of layered security in AWS VPC and outlines the essential configurations needed to establish a strong security.
What is Layered Security?
Layered security is an approach to cybersecurity that utilizes several levels of defense mechanisms to safeguard data and assets. It guarantees that even in the event of a breach in one layer, other layers will still provide protection. Network segmentation, access control, encryption, monitoring, and other features are all included in an AWS VPC.
Key Components of Layered Security in AWS VPC
1. Network Segmentation with Subnets
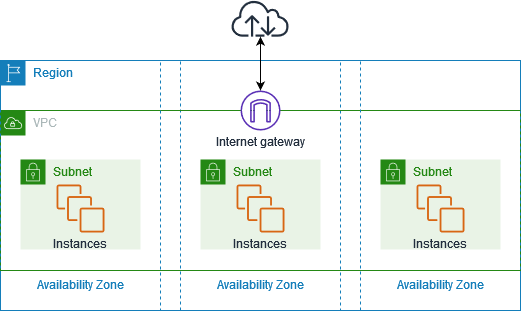
AWS VPCs allow you to create public and private subnets. Public subnets typically host resources that need internet access (like web servers), while private subnets are isolated from the internet and host backend services (like databases).
- Public Subnet: Routed through an Internet Gateway
- Private Subnet: Uses NAT Gateway/Bastion Host for limited outbound access
2. Security Groups and NACLs
- Security Groups (SGs) act as virtual firewalls at the instance level. They are stateful, meaning responses to inbound traffic are automatically allowed.
- Network Access Control Lists (NACLs) act at the subnet level. They are stateless and require explicit rules for both inbound and outbound traffic.
Best Practices:
- Apply the principle of least privilege: only allow necessary ports and IPs.
- Use different SGs for different application tiers (e.g., web, app, database).
- Use NACLs for additional subnet-level protection.
3. IAM Roles and Policies
Use IAM (Identity and Access Management) to control access to AWS services and resources.
- IAM Users/Groups: For human access
- IAM Roles: For service-level access (e.g., EC2 instance access to S3)
- Policies: Define permissions in JSON format
Security Tip: Use IAM roles for EC2 instances instead of hardcoding credentials.
4. VPC Endpoints and PrivateLink
Avoid exposing your services to the public internet by using:
- VPC Endpoints: Connect to AWS services privately using PrivateLink.
- Gateway Endpoints: For services like S3 and DynamoDB.
This ensures your data never leaves the AWS network.
5. Bastion Hosts and Session Manager
To manage instances in private subnets:
- Bastion Host: A secure jump server placed in a public subnet
- AWS Systems Manager Session Manager: Allows SSH-less access to instances without opening port 22
Best Practice: Prefer Session Manager for better security and audit logging.
6. Traffic Flow Logging with VPC Flow Logs
Enable VPC Flow Logs to monitor network traffic:
- Capture accepted and rejected traffic
- Identify potential threats or misconfigurations
- Integrate with CloudWatch for real-time monitoring
7. Encryption of Data in Transit and at Rest
- Data at Rest: Use AWS KMS for managing encryption keys. Services like EBS, RDS, and S3 support encryption.
- Data in Transit: Use SSL/TLS for all communications between clients and services.
8. Route Table Configuration
Use route tables to control the flow of traffic:
- Public subnets should have a route to the Internet Gateway
- Private subnets should route traffic through NAT Gateway
Restrict inter-subnet communication unless explicitly required.
9. Monitoring and Alerts
Set up logging and alerting with:
- AWS CloudTrail: Records all API calls
- AWS Config: Tracks changes to resources
- Amazon GuardDuty: Detects threats and anomalies
- AWS CloudWatch: For metrics and alarms
Step by Step procedure for configuring secured VPC
Step1: Creating a new VPC
- Navigate and click on VPC which will be available under the Networking & Content Delivery section of Services
- Click on Your VPCs from the left menu and Click on Create VPC button.

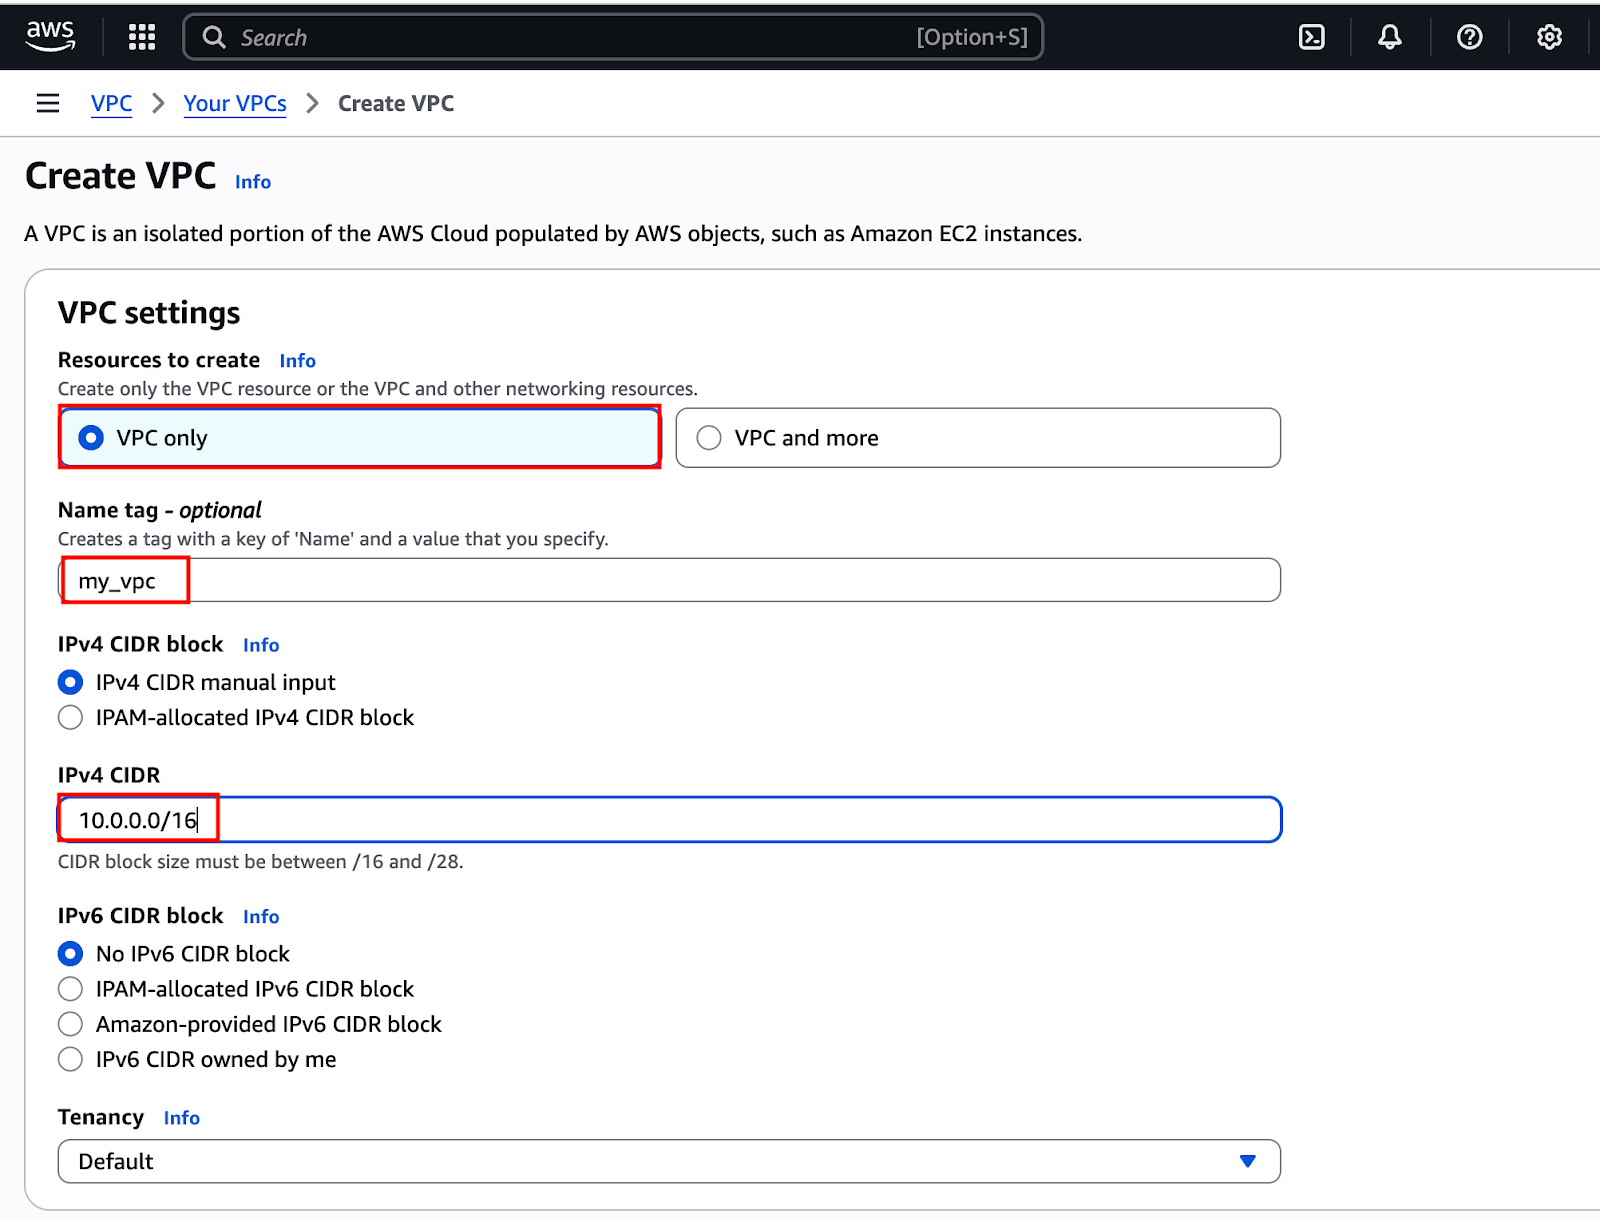
3. In Create VPC page fill the following details,
- Select VPC Only
- Name tag: Enter my_vpc
- IPV4 CIDR Block: Enter 10.0.0.0/16
- IPV6 CIDR block: Select No IPV6 CIDR block
- Tenancy: Default
- Click on the Create VPC button.
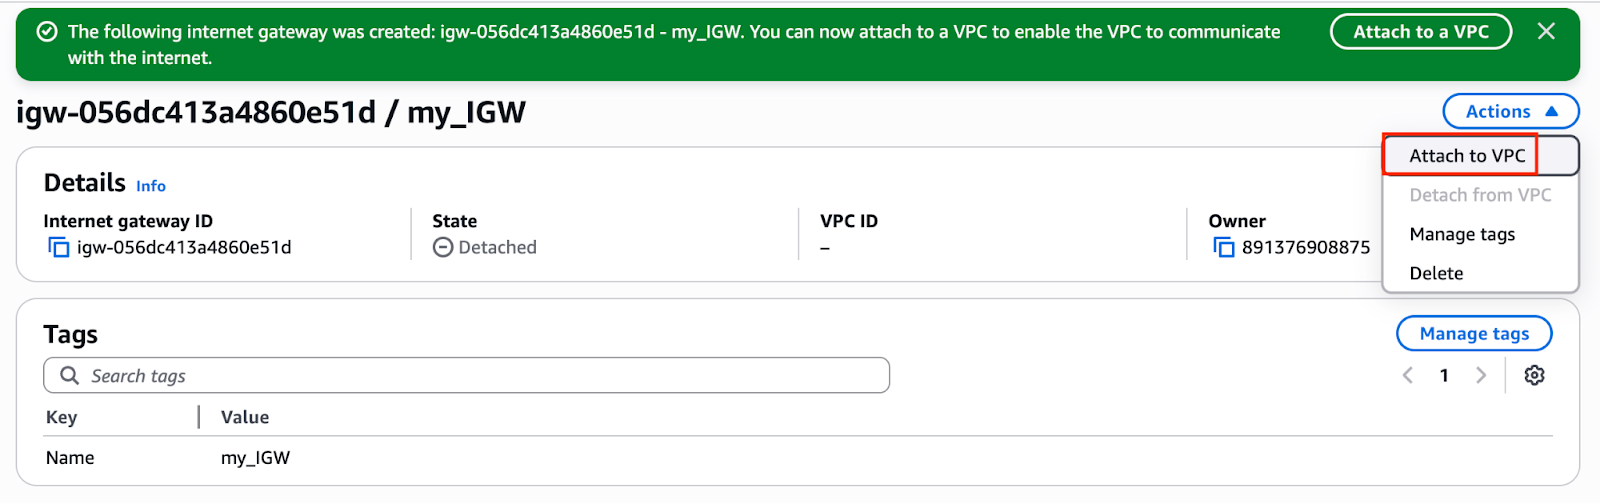
Step2: Creating and attaching an Internet gateway
- Click on Internet Gateways from the left menu and click on Create internet gateway button and enter the following details:
- Name tag: Enter my_IGW
- Click on Create internet gateway button.
- Select the Internet gateway you created from the list.
- Click on the Actions button.
- Click on Attach to VPC button.
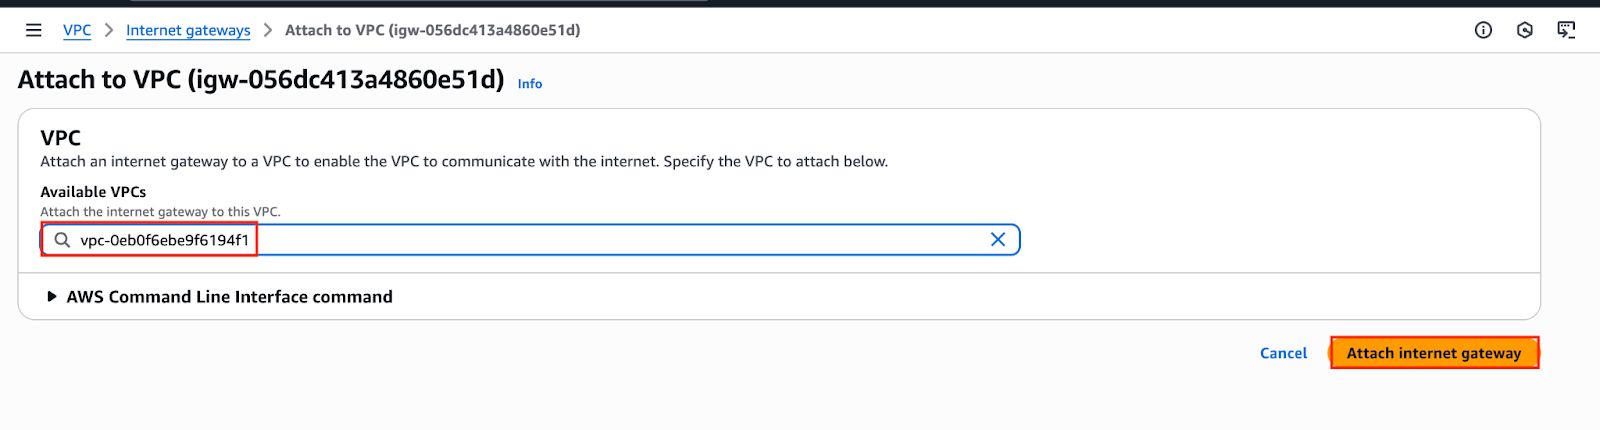
3. Select MyVPC from the drop-down and click on Attach internet gateway button.
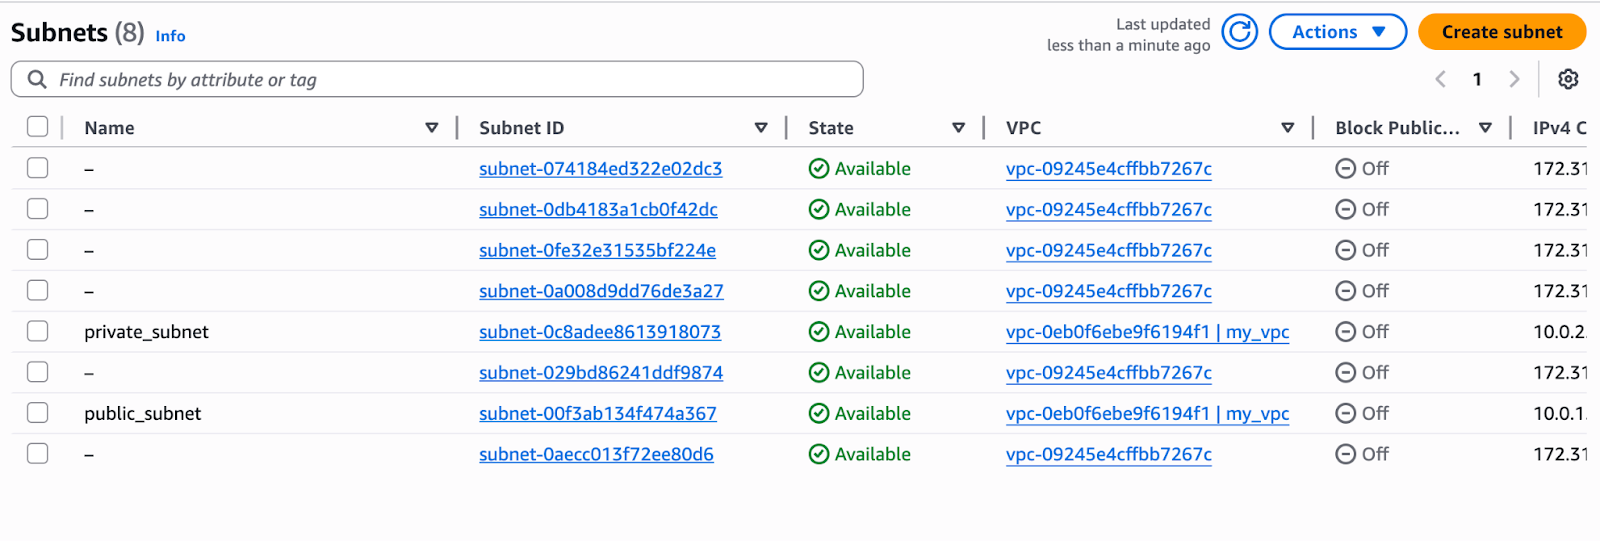
Step3: Creating two Subnets
- You will create 2 Subnets, one for public and another for private resources. First, we will create a public subnet.
- For the Public Subnet, click on Subnets from the left menu and click on Create subnet button.
- VPC ID: Select my_vpc (Select the VPC which you created from the dropdown)
- Name tag: Enter public_subnet
- Availability zone: Select No Preference
- IPv4 CIDR block: Enter 10.0.1.0/24
- Click on Create subnet button
3. For Private Subnet, click on Create Subnet again.
- VPC ID: Select my_vpc (Select the VPC which you created from the dropdown)
- Name tag: Enter private_subnet
- Availability zone: Select No Preference
- IPv4 CIDR block: Enter 10.0.2.0/24
Click on the Create subnet button.
Step4: Creating Route tables, configuring routes and associating them with Subnets
- Go to Route Tables from the left menu and click on Create route table button.
- Name tag: Enter public_route
- VPC: Select my_vpc (Select the VPC you created from the dropdown)
- Click on the Create route table button.

2. Similarly, go to Route Tables from the left menu and click on Create route table
- Name tag: Enter private_route
- VPC: Select my_vpc (Select the VPC you created from the dropdown)
- Click on the Create route table button.
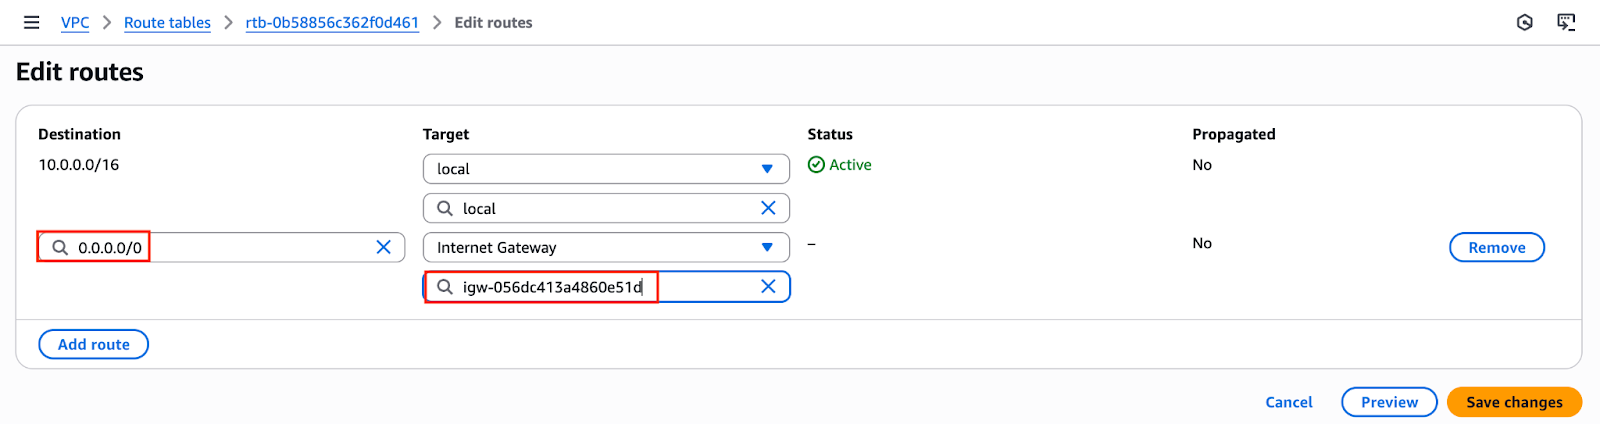
3. Now, you need to add routes to the Route Tables.
- Select public_route.
- Go to the Routes tab. Click on Edit routes. On the next page, click on Add route.
- Specify the following values:
- Destination: Enter 0.0.0.0/0
- Target: Select Internet Gateway from the dropdown menu to select my_IGW.
- Click on the Save changes button
4. Next, you need to associate the public_subnet with this public_route. Select the public_route and go to the Actions and in that go to Edit Subnet Associations tab.
- Click on Edit Subnet Associations.
- Select public_subnet from the list.
- Click on Save Associations button.
5. Similarly, you need to associate the private_subnet with this private_route. Select the private_route and go to the Actions and in that go to Edit Subnet Associations tab.
- Click on Edit Subnet Associations.
- Select private_subnet from the list.
- Click on Save Associations button.
Step 5: Launching 2 EC2 Instances
- Navigate to Services and choose EC2 under Compute
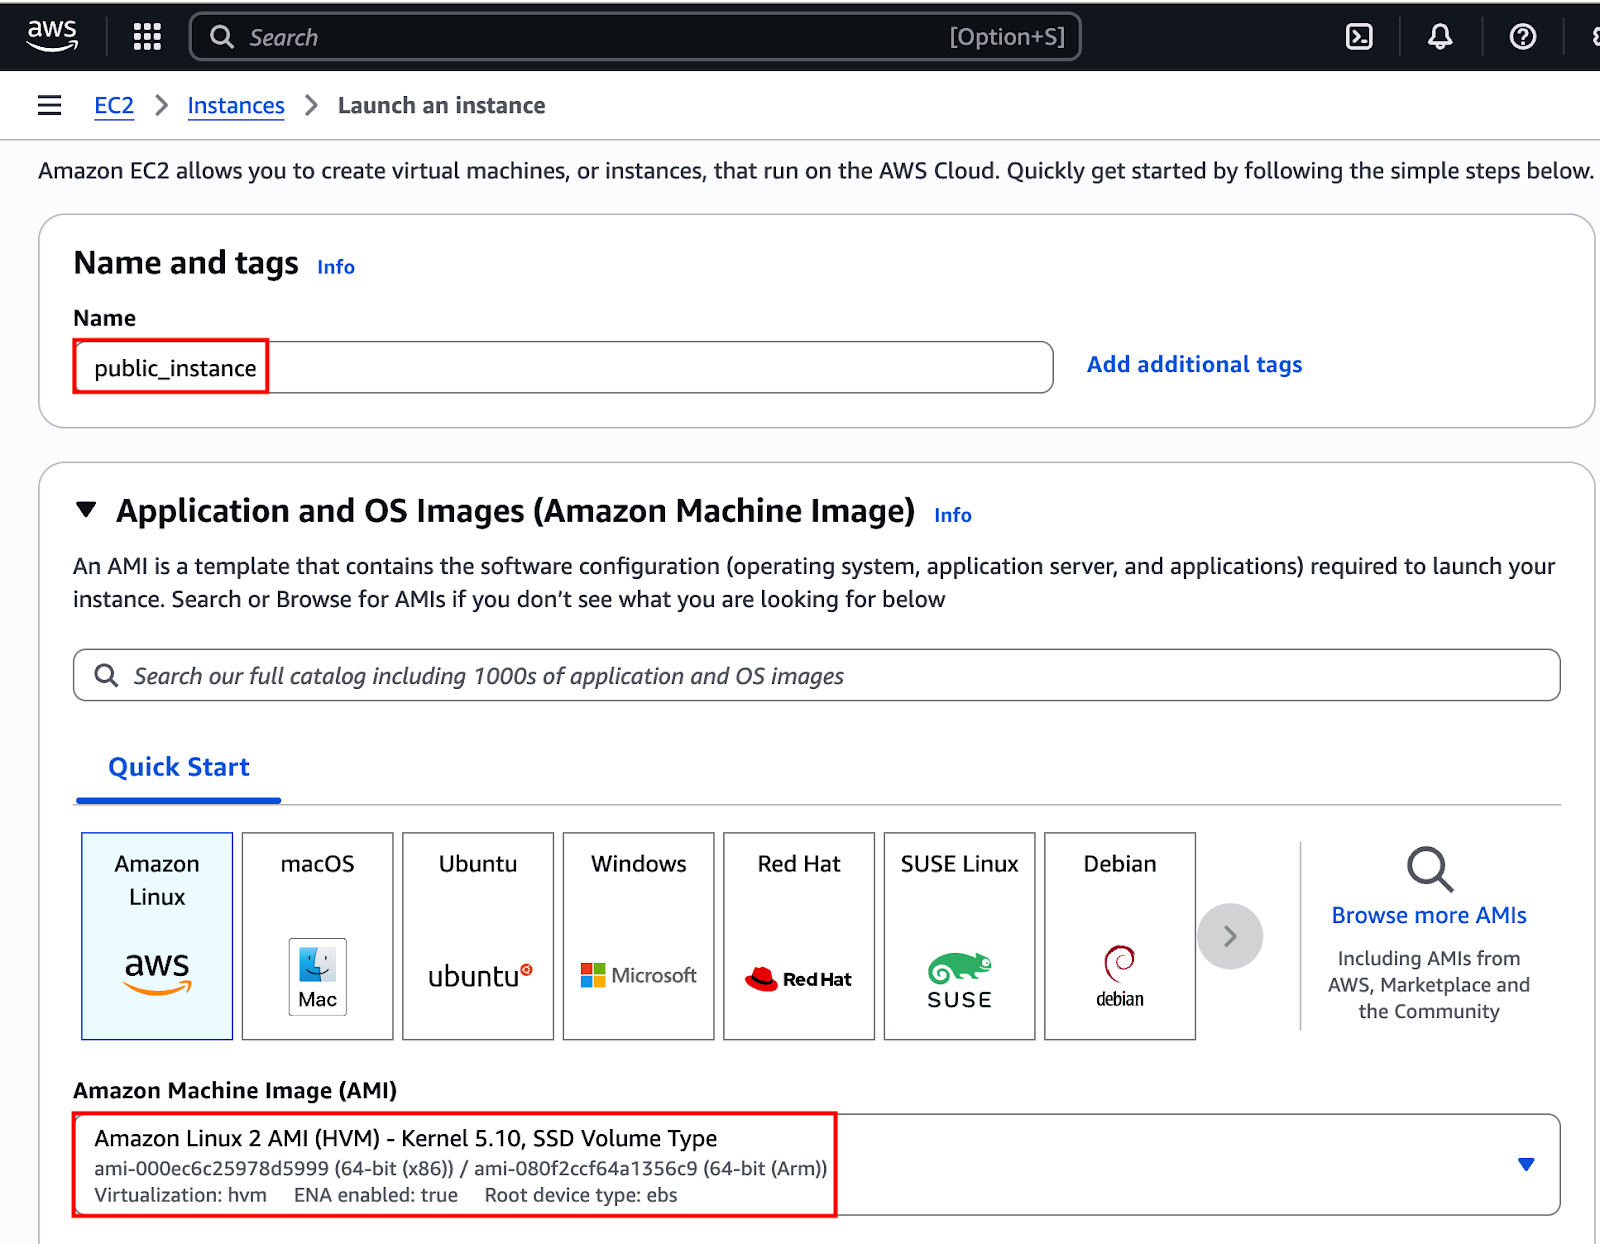
- Navigate to Instances on the left panel and click on Launch Instances button.
- Name : Enter public_instance
- For Amazon Machine Image (AMI): Search for Amazon Linux 2 AMI in the search box and click on the select button.
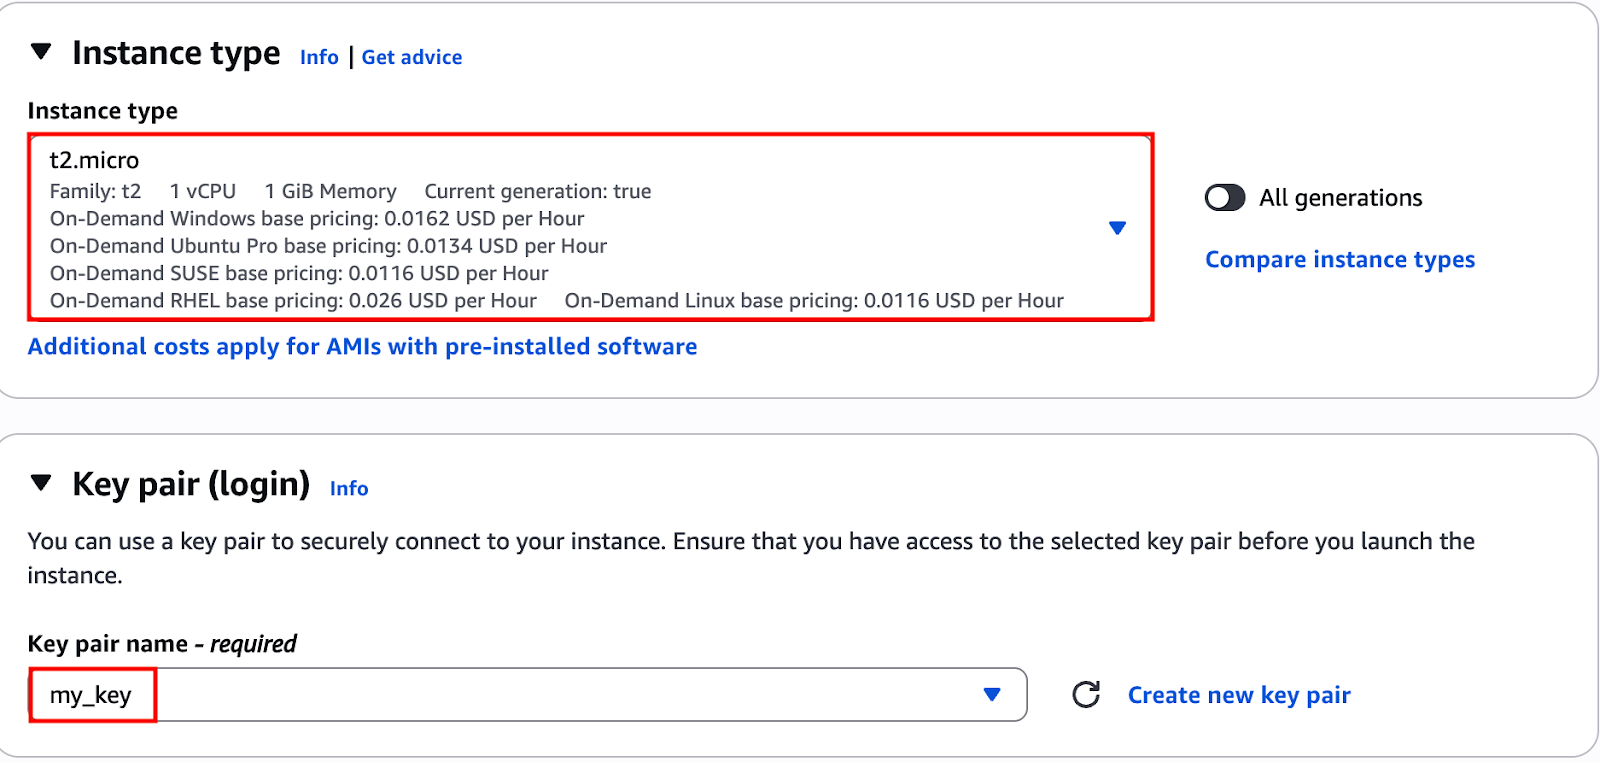
5. For Instance Type: Select t2.micro
6. For Key pair: Select Create a new key pair Button
- Key pair name: myKey
- Key pair type: RSA
- Private key file format: .pem
- Select Create key pair Button.
7. In Network Settings Click on Edit button:
- VPC: Select my_vpc
- Subnet: Select public_subnet
- Auto-assign public IP: Enable
- Create a new security group
- Under Inbound Rules, click on the Add Rule button.
- To add SSH,
- Choose Type: Select SSH
- Source: Anywhere-IPv4
- To add All ICMP – IPv4,
- Click on Add Rule
- Choose Type: Select All ICMP – IPv4
- Source: Anywhere IPv4
8. Keep Rest thing Default and Click on Launch Instance Button.
9. Select View all Instances to View Instance you Created.
10. Similar to the above, launch another EC2 instance:
- Name the instance as private_instance
- Key pair : Select the existing one
- VPC: Select whizlabs_VPC
- Subnet: Select private_subnet
- Auto-assign public IP: Disable
- Choose Select an existing security group and remove default one then select whizlabs_securitygroup
11. Keep Rest thing Default and Click on Launch Instance Button.
- Select View all Instances to View Instance you Created.

Step6: Testing the EC2 instances
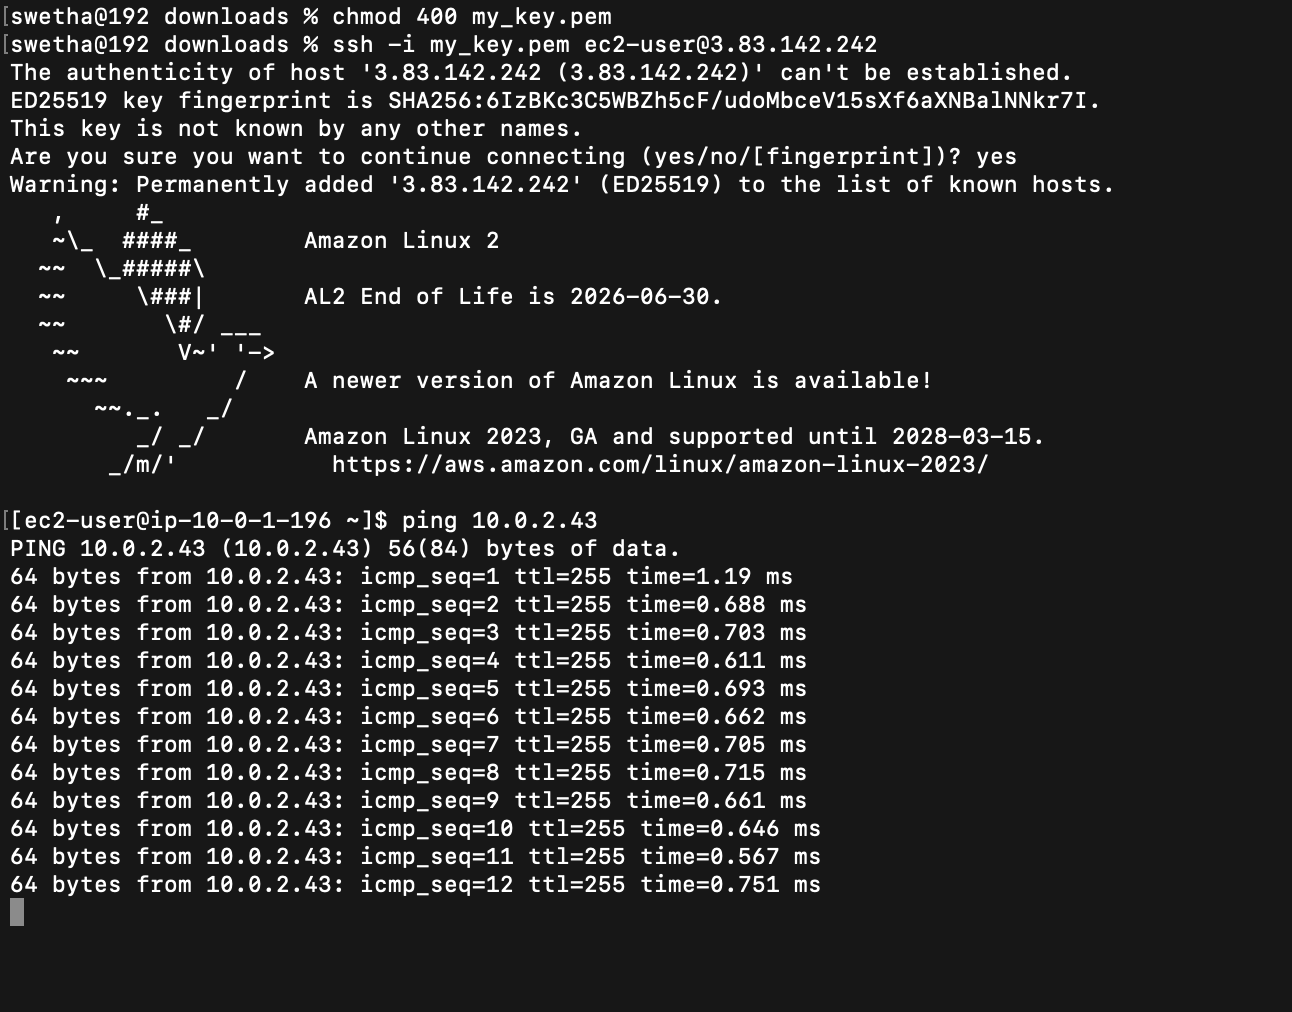
- Select the public_instance from the EC2 dashboard and copy the public IPv4 address.
- Ping the private IP of your private_instance by using the below command:
- ping <your Private EC2 IPv4 address>
- Once you execute this command, you will receive a response from the IP.
Conclusion
Securing AWS VPC through layers involves more than simply installing a firewall. It requires provisioning of network structure, access management, encryption methods, and monitoring systems to establish a thorough and robust security framework. By adh following the recommended guidelines outlined in this blog, organizations can greatly secure their cloud environments. Keep in mind that security is an ongoing process that needs to adapt as threats and workloads transform. Follow DevOps Horizon Website for more Cloud and DevOps Blogs